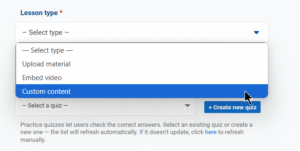
To create custom content, select the Custom content option from the drop-down menu in the Lesson type step, as shown below.
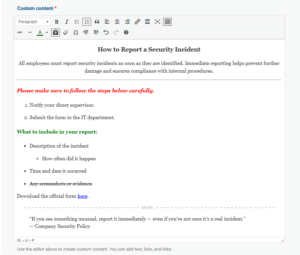
After you choose the Custom content option, a new editor field will appear where you can write and format your lesson directly.
The editor supports:
-
Text styles: Paragraphs and headings (H1, H2, H3)
-
Formatting: Bold, italic, underline, strikethrough, text color (red, green, black)
-
Lists: Numbered and bulleted lists, including sub-lists
-
Quotes: Blockquote formatting
-
Links: Insert and edit hyperlinks
-
Layout: Horizontal line to separate sections
-
Other tools: Undo/redo, clear formatting, source code (HTML) view, and table insertion
These options allow you to structure content clearly without uploading external files. Once you finish creating your custom content in the editor, click Create lesson at the bottom to save your lesson.
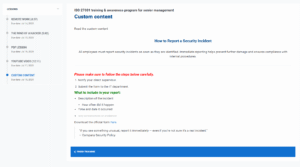
How the custom content lesson is displayed
Custom content is shown as formatted text right in the lesson page.


